Crafts
Valentine Box Ideas for Kids: From Pokemon and Bluey to Avatar and Mickey & Minnie’s Runaway Railway
Creating one-of-a-kind and creative Valentine boxes is a beloved tradition, and these six themed Valentine box ideas for your child can help you get started.
Valentine’s Day is a special occasion for children to express their respect and friendship to their classmates. Making and decorating Valentine boxes is one of the most cherished holiday traditions. These boxes, which can be made in a variety of fun and creative ways, are used to collect Valentine’s Day cards from friends. Look no further than these six themed ideas for your child’s Valentine box for inspiration.
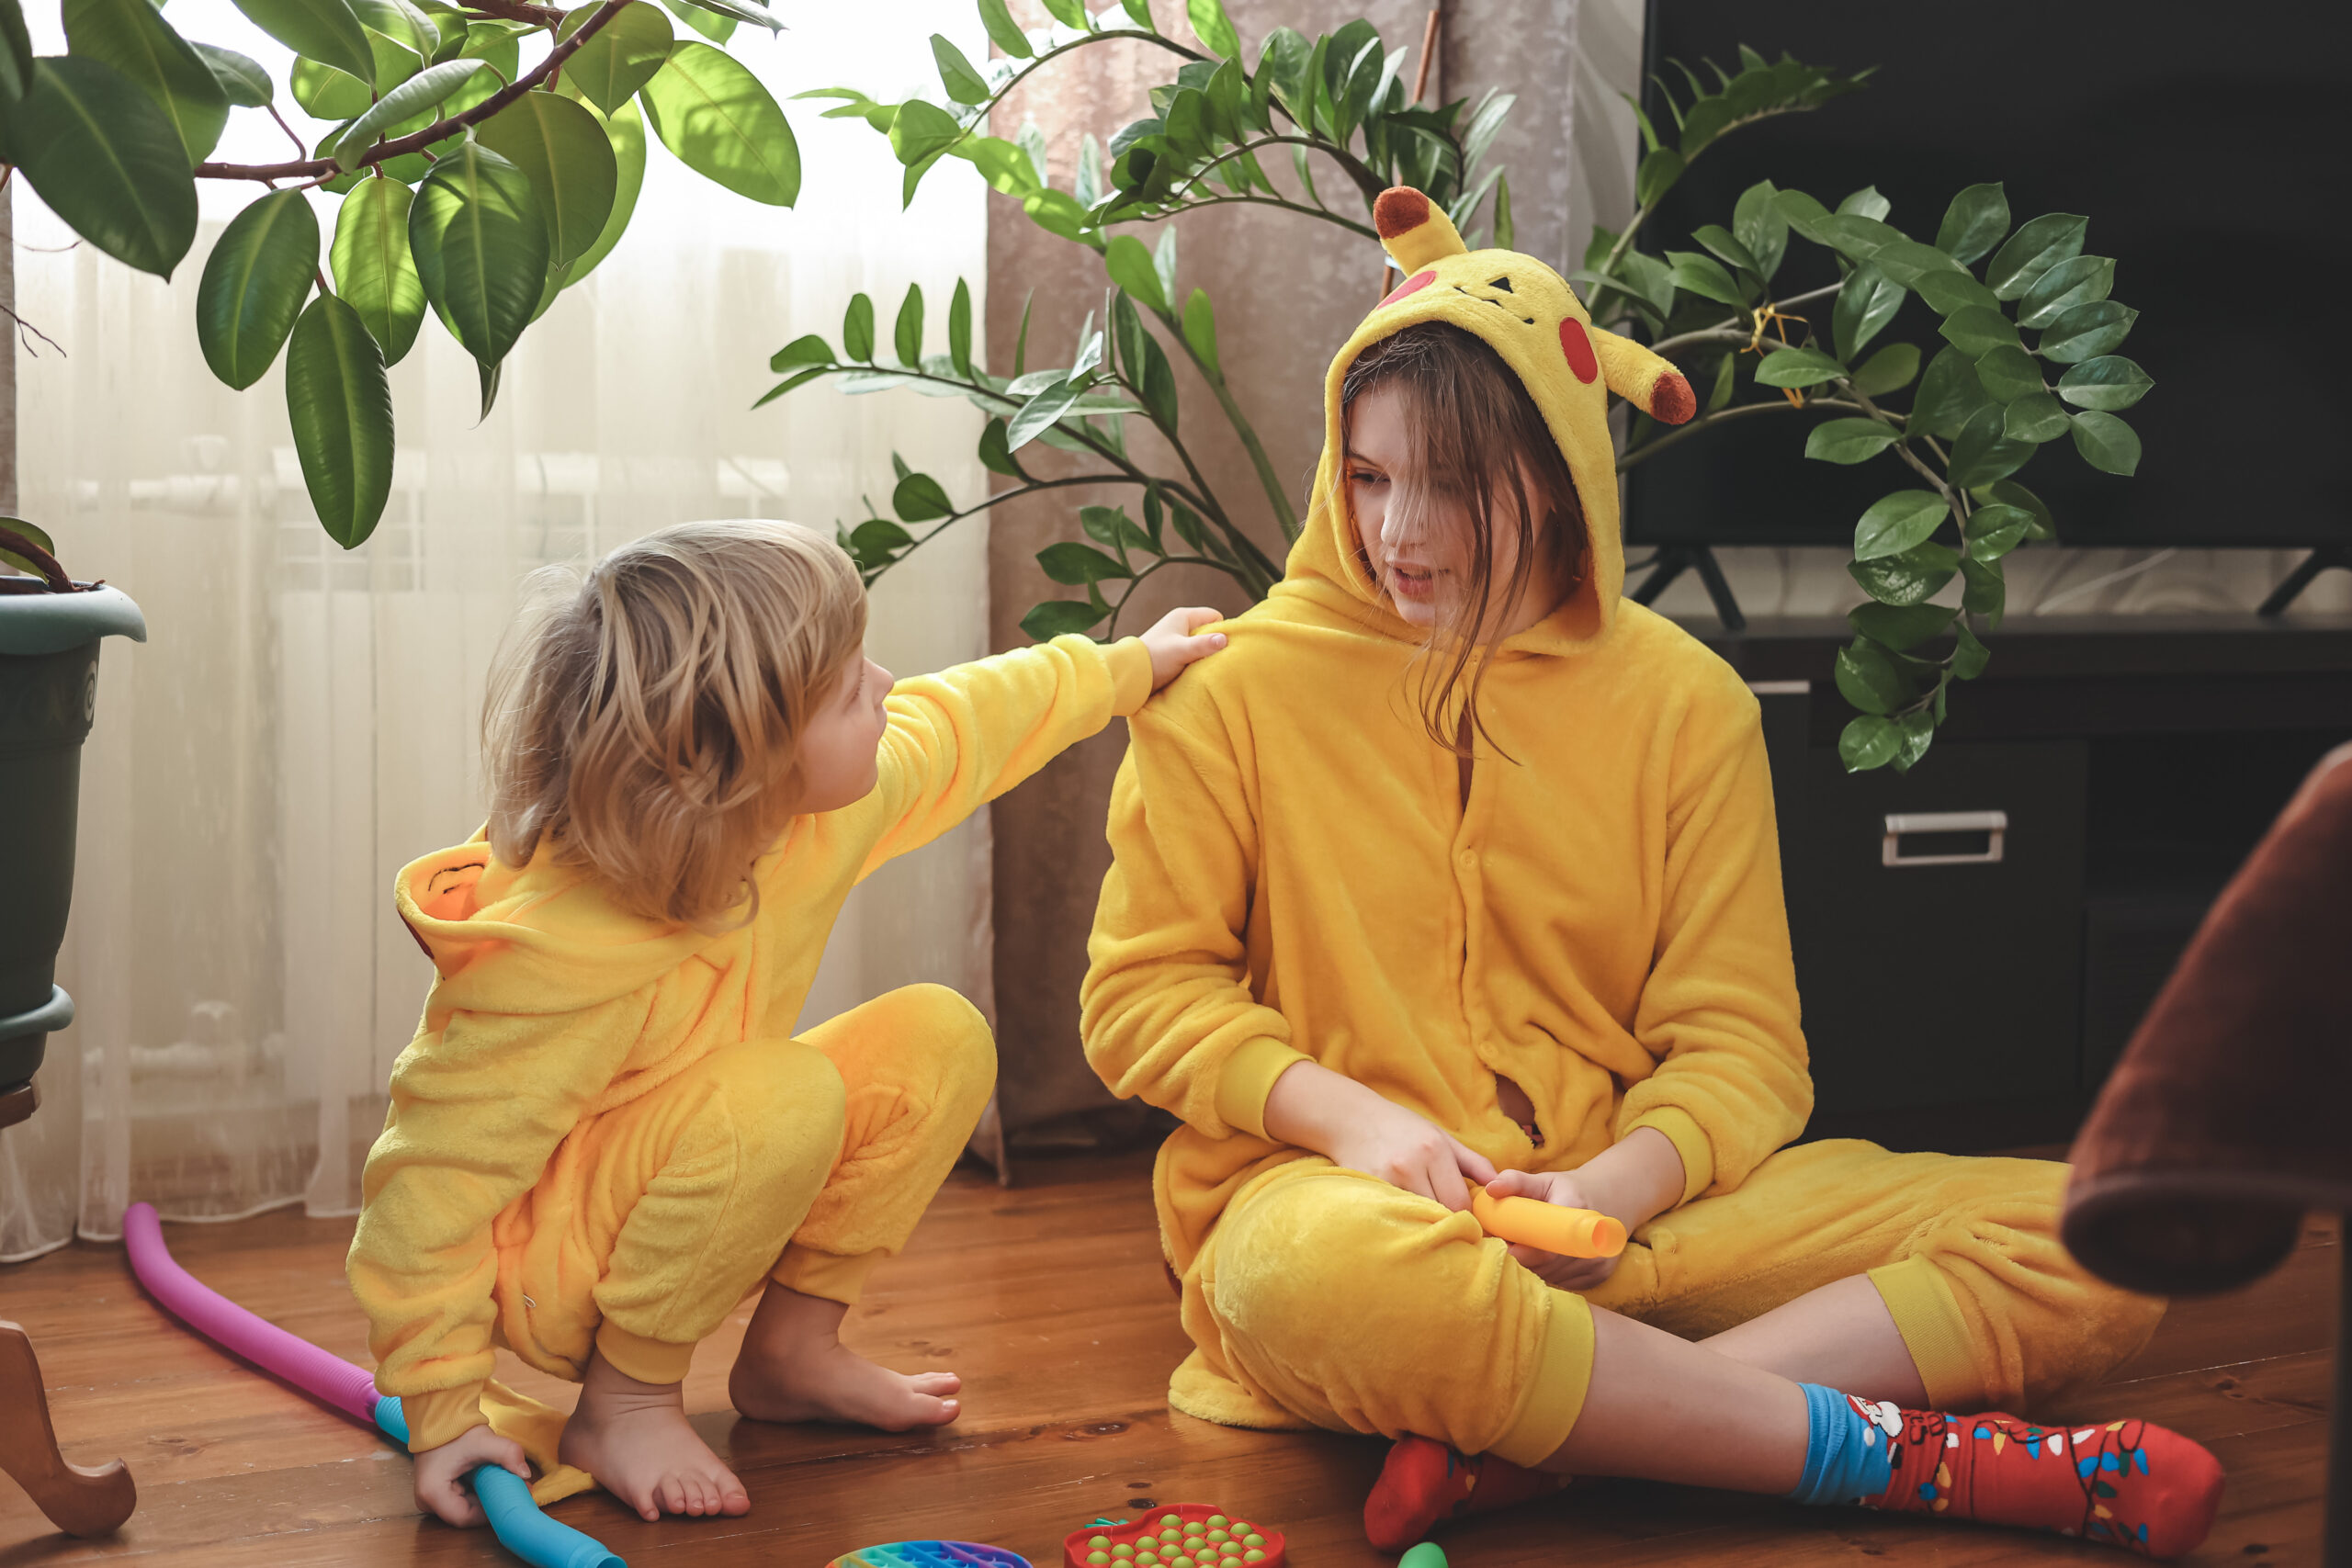
Pokemon Poké Ball Valentine Box

A Poké Ball (pokeball) shaped box is a fun and unique way for your child to show off their Pokemon obsession to their classmates. You’ll need a round cardboard box and some paint to make this Poké Ball-shaped box. Paint the box red and white first, then add the Poké Ball design with black paint or markers.
Your child will enjoy showing off their Poké Ball-shaped Valentine box to their classmates, and it will undoubtedly be a hit with their peers. This is an excellent way for your child to express and share their love of Pokemon with others. So gather some cardboard boxes, paint, and markers, and prepare to make a one-of-a-kind Poké Ball-shaped Valentine box for your child.
Disney’s Frozen Valentine Box

This ice palace-shaped box is ideal for fans of Elsa, Anna, and Olaf, and it will stand out from the crowd. You’ll need a shoebox, blue tissue paper, cotton balls, and Frozen character cutouts to make this ice palace-shaped box. Cover the shoebox with blue tissue paper first, and then use cotton balls to make snow. To give it a Frozen-inspired look, add cutouts of Elsa, Anna, and Olaf.
The attention to detail in this beautiful Valentine box will impress your child’s classmates, and it’s sure to be a hit among their friends. This is an excellent way for your child to express and share their enthusiasm for Disney’s Frozen. So gather a shoebox, blue tissue paper, cotton balls, and cutouts to make a one-of-a-kind ice palace-shaped Valentine box for your child.
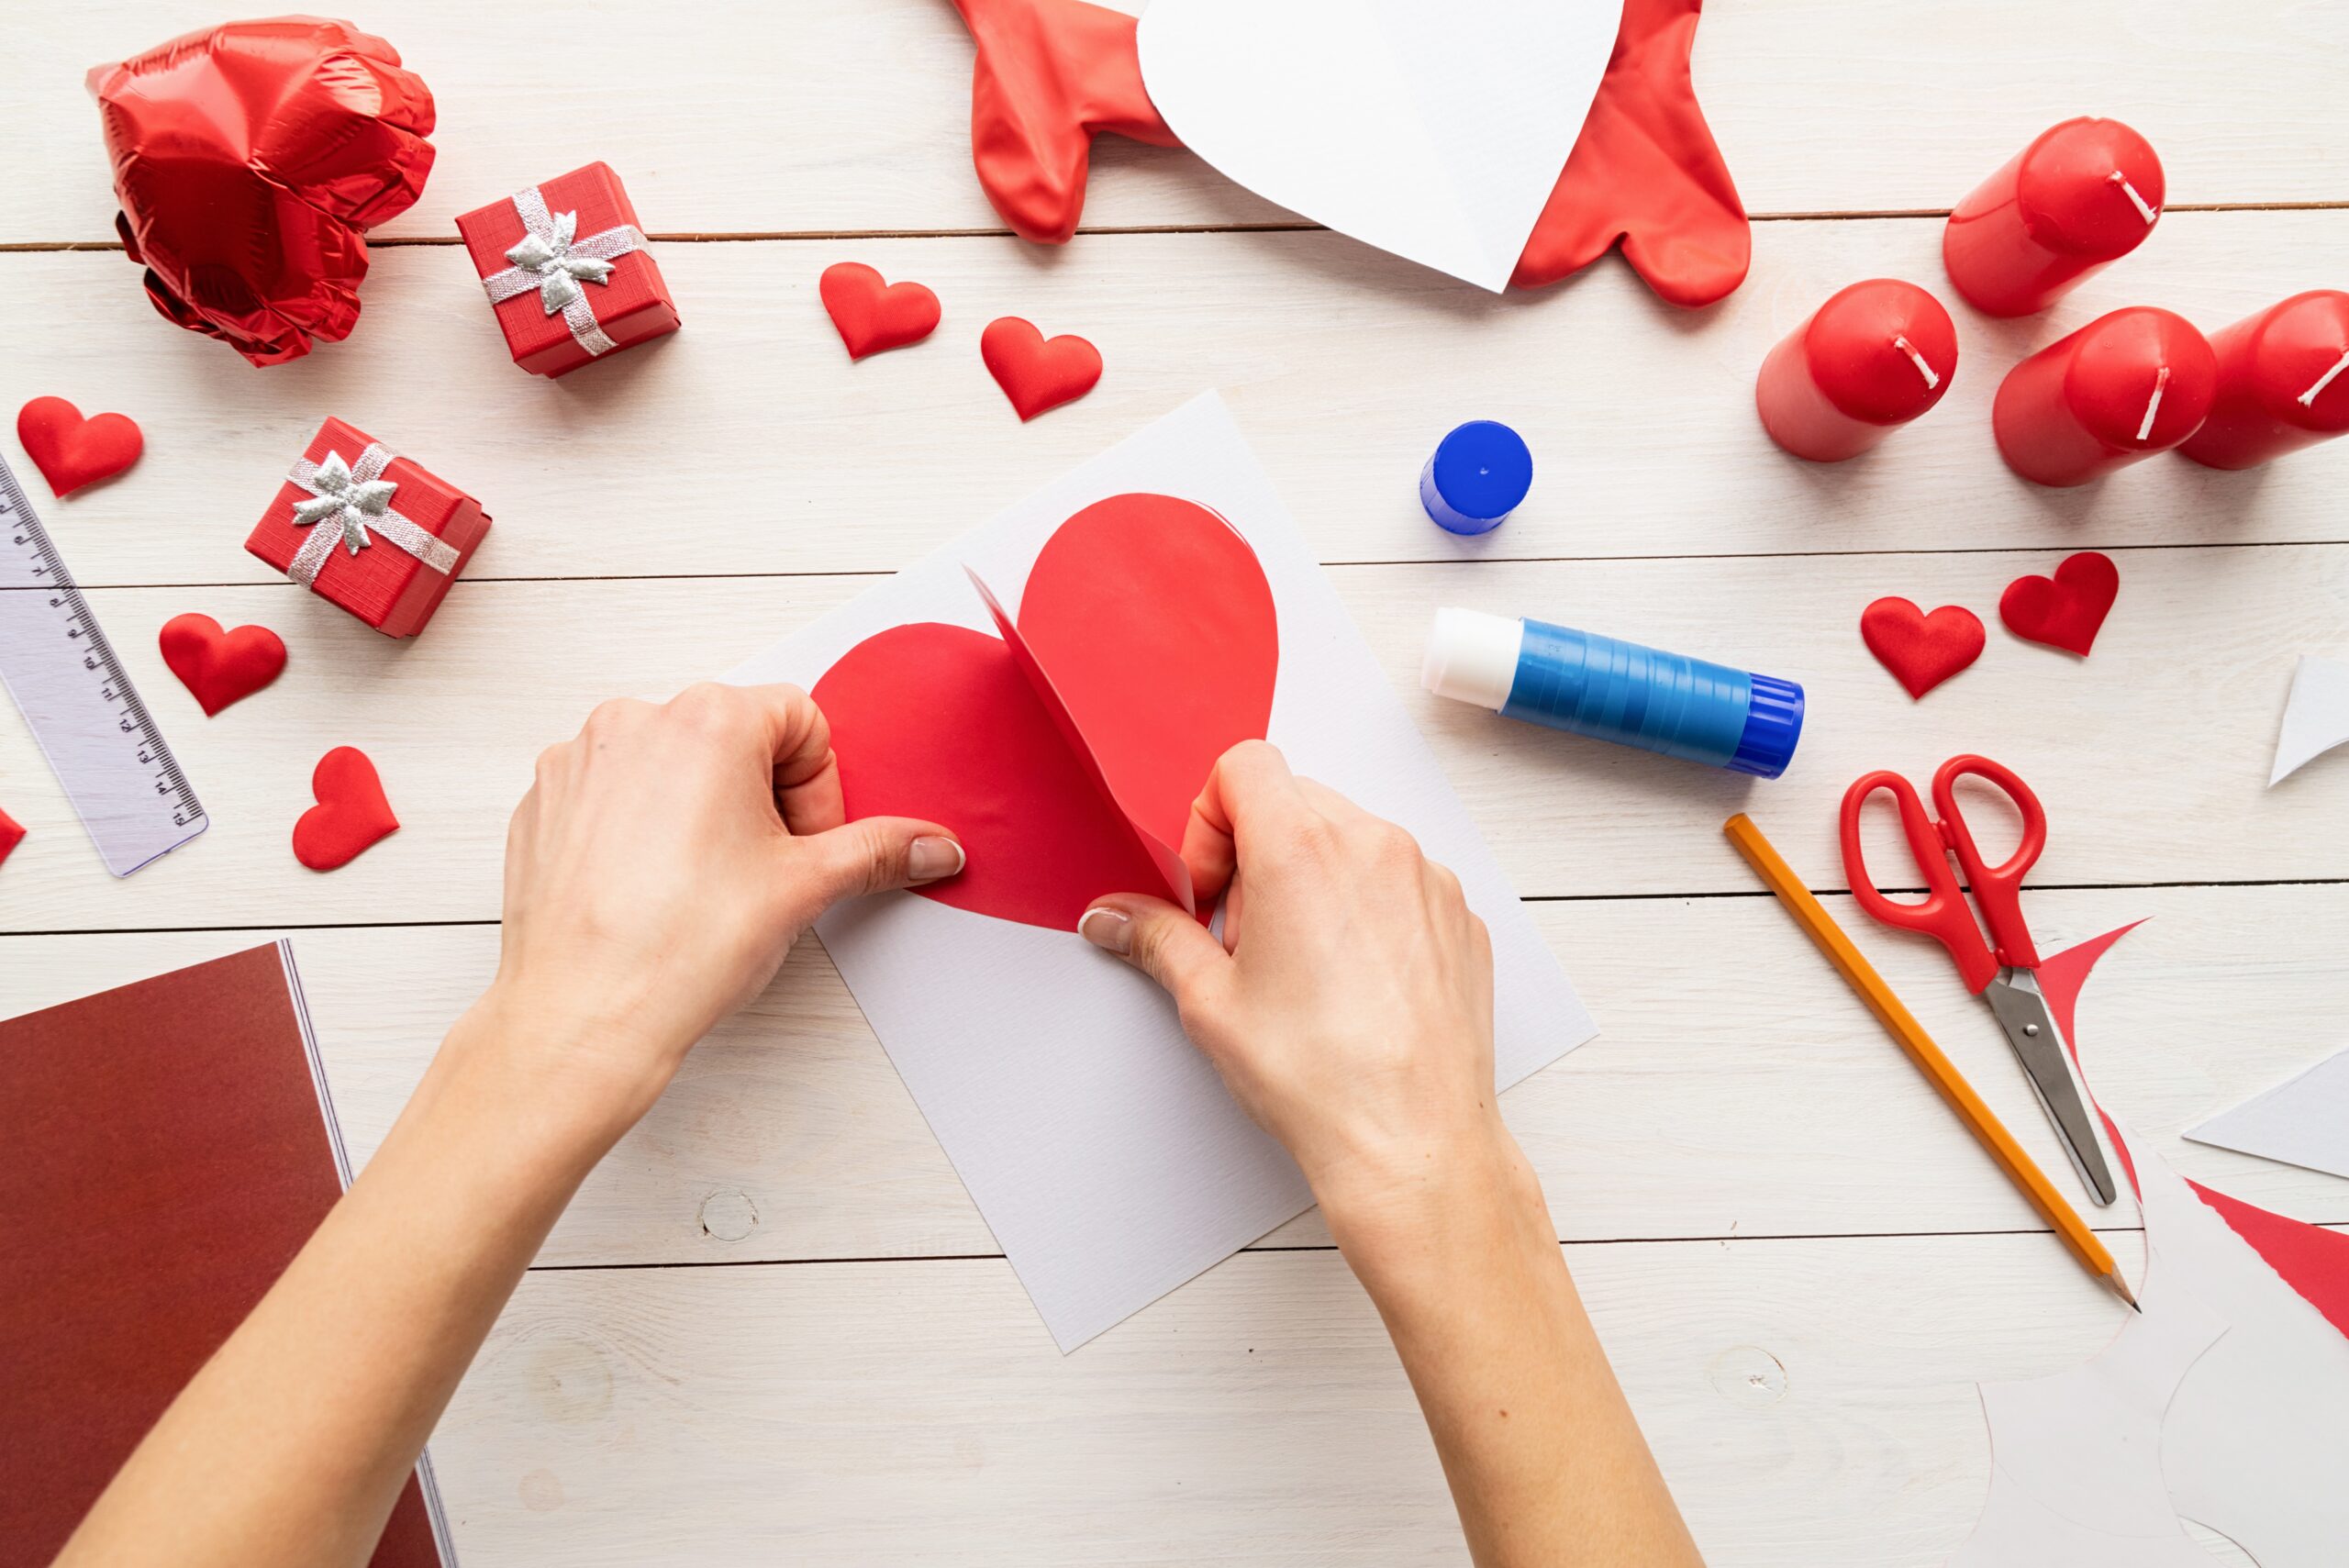
Classic Valentines Heart Valentine Box

This timeless and elegant Valentine’s Day theme is sure to be a hit with your child’s classmates. A large cardboard box, red or pink wrapping paper, and white or silver hearts cut out of construction paper are required to make this heart-shaped Valentine box. Cover the cardboard box with wrapping paper first, and then cut out the hearts with construction paper. Attach the hearts to the box with glue or tape.
Your child’s classmates will love delivering their Valentine’s cards to this elegant and timeless heart-shaped box. It’s a wonderful way for your child to show their enthusiasm for the holiday, and it’ll be a treasured keepsake for years to come. So gather a large cardboard box, wrapping paper, and construction paper and prepare to make a one-of-a-kind heart-shaped Valentine box for your child.
Disney’s Bluey Valentine Box

The “Heeler House” shaped box is ideal for fans of the show and will stand out from the crowd. You’ll need a shoebox, blue paint or construction paper, and cutouts of Bluey, Bingo, Chilli, and Bandit to make this “Heeler House” shaped box. Cover the shoebox with blue paint or construction paper first. Then, label it “Heeler House” and add the cutouts of Bluey, Bingo, Chilli, and Bandit.
Your child’s classmates will have a great time guessing what the “Heeler House” shaped box is, and it will undoubtedly be a hit with their peers. This is an excellent way for your child to express and share their enthusiasm for Disney’s Bluey. So grab a shoebox, some blue paint or construction paper, and some cutouts to make a one-of-a-kind “Heeler House” shaped Valentine box for your child.
Pandora’s Avatar Valentine Box

If your child enjoys James Cameron’s Avatar, this Valentine box idea is ideal for them. A floating mountains-shaped box is an excellent choice that is sure to impress. To make this box, you’ll need a large cardboard box, blue paint, Styrofoam balls, and some Avatar figures. To begin, paint the cardboard box blue to resemble the floating mountains. Then, using Styrofoam balls, make 3D elements and add Avatar character figures to give it an Avatar-inspired look.
Your child’s classmates will be impressed by the unique and creative Valentine box, and it will undoubtedly be a hit with their classmates. This is an excellent way for your child to express and share their enthusiasm for Pandora and the World of Avatar. So gather a large cardboard box, paint, Styrofoam balls, and some Avatar figures and prepare to make a one-of-a-kind floating mountains shaped Valentine box that your child will adore.
Disneyland and Disney World’s Mickey & Minnie’s Runaway Railway Valentine Box

If your child enjoys Disney’s Mickey and Minnie’s Runaway Railway, this Valentine box idea is ideal for them. A train-shaped box is an excellent choice that is sure to impress. You’ll need a cardboard box, red and black paint, white paint for the details, and cutouts of Minnie and other Disney characters to make this train-shaped box. To begin, paint the cardboard box red and black to look like a train. Then, on the front, use white paint to add details like windows and Mickey’s face. Finally, add Minnie and other Disney characters cutouts and label it “Runaway Railway.”
Your child’s classmates will be impressed by the unique and creative Valentine box, and it will undoubtedly be a hit with their classmates. This is an excellent way for your child to express and share their enthusiasm for Disney’s Mickey & Minnie’s Runaway Railway. So grab a cardboard box, some paint, and some cutouts and get ready to make a one-of-a-kind train-shaped Valentine box for your child.
There’s a Valentine box idea for every child, whether they like Pokemon, Disney’s Frozen, hearts, Bluey, James Cameron’s Avatar, or Mickey and Minnie’s Runaway Railway. These Disney-themed ideas will help you and your child create a one-of-a-kind Valentine box that will wow their classmates.
These Valentine box ideas are not only fun and easy to make, but they also provide an excellent opportunity for you and your child to bond and have fun together. These crafts encourage your child’s creativity and imagination while also allowing them to express their love and passion for their favorite characters and themes.
Valentine’s Day is a special time for children to express their love and friendship to their classmates, and making a unique and creative Valentine box is a beloved tradition. These Disney-themed ideas will help you and your child create a one-of-a-kind Valentine box that will wow their classmates. So gather some cardboard boxes, paint, and construction paper and prepare to make a Valentine box that your child will adore.
Crafts
Gotta Craft ‘Em All: Pokemon-Themed Ideas for Family Fun
Unleash your family’s inner trainers with these exciting and engaging Pokemon-themed crafts, from Pikachu ear headbands to Pokemon terrariums, there’s something for every level of crafter!
Welcome to the world of Pokemon, where adventure and fun are always just a catch away! If your kids are fans of the beloved franchise, then they’ll love incorporating their love for Pokemon into your next family craft session. It’s a great opportunity to bond with your kids and show them how to express their creativity in new and exciting ways. Whether you’re a seasoned crafter or just starting out, these Pokemon-themed craft ideas are sure to inspire your little trainers and make your family craft time an unforgettable experience.
The world of Pokemon is full of colorful and exciting characters that kids can’t help but love. From Pikachu to Charizard, there’s a Pokemon for every taste and personality. That’s why we’ve curated a list of fun and creative Pokemon-themed crafts that will help bring the magic of Pokemon into your home. From Pokemon Go scavenger hunts to Pikachu ear headbands, these crafts are perfect for any age and skill level, and are sure to delight your kids. So, gather your family and get ready to catch some fun with these Pokemon-themed crafts!
Pokemon Go Scavenger Hunt: A Fun and Active Way to Enjoy the Great Outdoors
Get your kids excited about the great outdoors with a Pokemon Go-inspired scavenger hunt! This craft is a fun and active way to get your kids moving, while also encouraging them to explore their local park or backyard. All you need is a printer, some pictures of different Pokemon characters, and a list of characters for your kids to find.
To start, print out pictures of different Pokemon characters, such as Mewtwo, Eevee, Pikachu, and others. You can find these pictures online, or use screenshots from the Pokemon Go app. Next, hide the pictures around your backyard or local park, making sure they are in easy-to-find locations. Then, give your kids a list of characters to find and let them explore as they hunt for their favorite Pokemon.
This scavenger hunt is a great way to get your kids active, while also encouraging them to use their observation and problem-solving skills. It’s also a fun and interactive way for them to learn about different Pokemon characters and their unique abilities. Plus, it’s a great way to spend some quality time with your kids while they are having fun exploring the great outdoors and catching Pokemon characters.
Pokemon-Themed Finger Puppets: Bring Your Kids’ Favorite Characters to Life
Bring your kids’ favorite Pokemon characters to life with this fun and easy craft. This is a perfect way to encourage your kids to use their imagination and creativity while they are having fun with their favorite characters. All you need is some felt, scissors, and a hot glue gun.
To start, cut out the shapes of the Pokemon characters you’d like to make such as Jigglypuff, Squirtle, Charizard, and others using felt. You can find patterns online or make your own. Then, glue them onto popsicle sticks to create adorable finger puppets. You can also add some details with markers or paint to make them more detailed and lifelike.
Your kids will love bringing their favorite Pokemon characters to life with these finger puppets. They can use them to create their own stories and adventures, or to play with their friends and family. These finger puppets also make great additions to your child’s puppet collection and can be used in their role-playing and storytelling activities. This craft is a perfect way to encourage your kids to be creative and have fun while they are learning about their favorite Pokemon characters.
Pokemon Card Wallet: A Fun and Functional Way to Organize and Keep Safe your Kids’ Pokemon Cards
Keep your kids’ Pokemon cards safe and organized with this fun and functional craft. Not only it is a fun way to spend some time with your kids, but it also teaches them how to take care of their belongings. All you need is some cardstock, a glue stick, and a piece of ribbon.
To start, fold a piece of cardstock in half, and glue the edges together to create a pocket for the cards. Make sure that the pocket is big enough to fit a number of cards. Then, attach a ribbon to the back of the cardstock using the glue stick, creating a wristlet. Your kids can use the ribbon to wear the wallet around their wrist and keep their cards with them at all times.
Your kids will love carrying around their Pokemon cards in style with their new wallet. They can use it to keep their cards organized, and to show off their favorite Pokemon characters to their friends. This craft is a great way to teach your kids how to take care of their things and to encourage them to be organized. Additionally, it is a fun and interactive way for them to express their love for Pokemon cards and characters.
Pokemon-Themed Paper Lanterns: Add Some Color and Excitement to your Family Room
Add some color and excitement to your family room with these fun and easy paper lanterns. This is a great way to bring the magic of Pokemon into your home and to add some fun and excitement to your family room. All you need is some colored paper, scissors, and a glue stick.
To start, cut out the shapes of different Pokemon characters such as Mew, Squirtle, and others, using colored paper. Then, glue the characters onto the paper lanterns. You can use different colors of paper to make them more vibrant and eye-catching. Once the glue is dry, you can hang the lanterns up in your family room.
These Pokemon-themed paper lanterns will add a touch of color and excitement to your family room, and they will be a hit with your kids. They can be used as decorations for a Pokemon-themed party or just as a way to add some fun to your family room. This craft is a perfect way to bring the world of Pokemon into your home and to encourage your kids to express their love for their favorite characters.
Pokemon Terrariums: A Fun and Easy Way to Introduce Your Kids to the World of Gardening
Introduce your kids to the world of gardening with this fun and easy craft. This is a great way to spend some time with your kids while they are learning about plants and nature. All you need is a small container, some soil, and small plastic Pokemon figures.
To start, fill a small container with soil and help your kids arrange the plastic Pokemon figures in it. Then, you can add small plants such as succulents, moss or cacti to create a mini Pokemon world. Once the terrarium is set, you can put it on a table or a window sill, where it can get some light and be visible for your kids.
These Pokemon terrariums are a fun and interactive way for your kids to learn about plants and gardening. They will love creating their own little Pokemon world and taking care of it. Additionally, it’s a great way to spend some quality time with your kids while they are having fun and learning new things. It’s also a fun way to bring the world of Pokemon into your home, and to encourage your kids to express their love for their favorite characters in a creative and educational way.
Pokemon-themed Picture frames: Show off Your Kids’ Love for Pokemon and Memories
Show off your kids’ love for Pokemon with this fun and easy craft. This is a great way to display your kids’ favorite Pokemon characters and memories in an interactive way. All you need is a plain picture frame, some paint, and some small plastic Pokemon figures.
To start, have your kids paint the frame using their favorite colors and let it dry. Once the paint is dry, they can glue their favorite Pokemon figures on the frame using a glue stick. They can choose figures that represent their favorite Pokemon characters or the ones that they caught while playing Pokemon Go. Once the glue is dry, you can insert a picture inside the frame.
These Pokemon-themed picture frames are a great way to display your kids’ favorite Pokemon characters and memories. They can hang them in their room or use them as a decoration for their room or a Pokemon-themed party. This craft is a fun and interactive way for kids to express their love for Pokemon and to display their memories in a creative way. It’s also a great way to spend some quality time with your kids while they are having fun creating a unique piece of art.
Pokemon-themed Bookmarks: Keep Your Kids’ Reading Fun and Exciting
Encourage your kids to read more with these fun and easy Pokemon-themed bookmarks. This is a great way to add some excitement to your kids’ reading time, and to show them how to express their creativity. All you need is some cardstock, markers or paint, and some small plastic Pokemon figures.
To start, have your kids draw or paint their favorite Pokemon characters on cardstock and cut them out. Then, glue small plastic Pokemon figures on the cardstock and let it dry. Once the glue is dry, your kids can use their new Pokemon-themed bookmarks to mark their spot in their favorite books.
These Pokemon-themed bookmarks are a great way to keep your kids’ reading fun and exciting. They can use them to mark their spot in their favorite books and to show off their love for Pokemon to their friends. Additionally, it’s a fun and interactive way for kids to express their creativity and to make reading more fun. This craft is also a great way to spend some quality time with your kids while they are having fun and learning new things.
Pokemon-themed Origami: Learn How to Fold Your Favorite Pokemon Characters
Learn how to make your favorite Pokemon characters come to life with this fun and easy origami craft. This is a great way to teach your kids the art of origami and to show them how to express their creativity with paper. All you need is some colored paper, and some instructions for folding different Pokemon characters.
To start, gather some colored paper and find origami instructions online for different Pokemon characters such as Psyduck, Jigglypuff, Pikachu, and others. Then, help your kids follow the instructions and fold the paper into the desired shape. Your kids can also experiment with different colors and patterns of paper to make their creations unique.
Your kids will love learning how to make their favorite Pokemon characters come to life with origami. It’s a fun and interactive way for them to express their creativity and to learn a new skill. Additionally, it’s a great way to spend some quality time with your kids while they are having fun and learning new things. Once they finish their origami Pokemon characters, they can display them in their room or give them as gifts to their friends.
Pokemon-themed crafts are a fun and interactive way for your kids to express their love for the beloved franchise and to spend quality time with the family. These crafts are perfect for any age and skill level, and are sure to delight your kids. Whether it’s a Pokemon Go scavenger hunt, Pikachu ear headbands or Pokemon-themed terrariums, there’s something for everyone. So gather your family and get ready to catch some fun with these Pokemon-themed crafts!
Crafts
DIY Moonstones from Disney Dreamlight Valley
Join us as we recreate the valued form of currency, Moonstones, from the popular video game Disney Dreamlight Valley IRL and bring it out of the game and into reality.

Join us as we venture to recreate the valued form of currency, Moonstones, from the popular video game Disney Dreamlight Valley IRL. While our versions are unable to be spent on in-game clothing and furniture, they make a tangible treasure for any fan of the game. Watch to see our ‘recipes’ needed to ‘craft’ this digital dough and bring it out of the game and into reality.
Please don’t forget to like the video and subscribe to our channel for more videos like this one.
Crafts
Art in the Style of Eric Carle
Let’s explore the colorful world of Eric Carle, children’s book author and illustrator. We’ll be using his famous works like “The Very Hungry Caterpillar,” “The Grouchy Ladybug,” and “The Very Busy Spider” as inspiration for our own art pieces. Whether you’re a seasoned artist or just starting out, we’ve got some tips and tricks to share with you. So grab your paintbrushes and let’s get to work!

Hi there, little caterpillars! Today, we’re going to be exploring the colorful creations of Eric Carle, children’s book author and illustrator. You may have munched on some of his famous works like “The Very Hungry Caterpillar,” “The Grouchy Ladybug,” and “The Very Busy Spider.” We’re going to be using these books as inspiration as we create our own art pieces. Whether you’re a seasoned artist or just starting out, we’ve got some tips and tricks to share with you. Grab your paintbrushes and let’s get to work, we can’t wait to see the amazing creations you’ll come up with!
Please don’t forget to like the video and subscribe to our channel for more videos like this one.
Creating Eric Carle-Inspired Art: A Step-by-Step Guide
Eric Carle is known for using painted papers in his distinctive collage-style illustrations, which he creates by cutting and layering hand-painted papers to create bold, vibrant, and imaginative artwork.
In addition to colorful papers, you’ll need scissors, a cutting mat, a ruler, and a pen or pencil for drawing.
We made a list of six steps to use when making your Eric Carle-inspired art.
- Create your own painted papers:
If you don’t have any store-bought painted papers, you can create your own by painting a series of papers in various colors and patterns. Use acrylic paints, watercolors, or any other type of paint that you prefer. Allow the paint to dry completely before moving on to the next step. - Choose your colors:
Eric Carle is known for his bold, vibrant colors. Choose a color scheme that you like and that will work well with the theme of your art. - Cut your shapes:
Use your scissors and cutting mat to cut out a variety of shapes and figures from your painted papers. You can use a ruler to help you create straight lines and precise shapes. - Arrange your shapes:
Lay out your cut-out shapes on a flat surface and experiment with different arrangements until you find a composition that you like. Think about how the shapes can interact with one another and create depth and dimension in your art. - Glue your shapes:
Once you have your final arrangement, use glue to adhere the shapes to a piece of paper or canvas. You can use a paintbrush to apply the glue or a glue stick for a neater finish. - Add details:
Use colored pens or pencils to add details to your art. You can draw lines, dots, and other shapes to add texture and interest to your composition.
Step back and admire your work: once you have finished your art, take a step back and admire your creation. You have just created your own unique, Eric Carle-style masterpiece!
Watch on YouTube: How to Make Detailed Eric Carle-style Art with Hand-Painted Paper Featuring Mickey Mouse and Simba
Video Transcript
Today we’ll be creating art in the style of Eric Carle. “The Very Hungry Caterpillar”, “The Grouchy Ladybug”, and the “Very Busy Spider” are some of his most famous works? Eric Carle is known for using hand-painted papers in his distinctive illustration style where he cuts and layers these pieces into bold vibrant and imaginative artwork. In addition to those colorful papers, you’ll also need some scissors, a cutting mat, a ruler, and a pen and pencil for drawing. We’ve made a list of six steps to use when creating your own Eric Carle inspired art. Step one: Create your own painted papers if you don’t have any store-bought painted papers, you can create your own by painting a series of papers in various colors and patterns. Step two: Choose your colors Eric Carle is known for his bold, vibrant colors. Choose a color scheme that you like and that will work well with the theme of your art. Step three: Cut out the shapes Use your scissors and cutting mat to cut out a variety of shapes and figures from your painted papers. Step four: Arrange your shapes Lay out your cut out shapes on a flat surface and experiment with different arrangements until you find a composition that you like. Step five: Glue your shapes down Once you have your final arrangement, use glue to adhere the shapes to a piece of paper or canvas. Finally, step six: Add details use colored pens or pencils to add details to your art You can draw lines, dots, and other shapes to add texture and interest to your composition. Take a step back and admire your work. You’ve just completed your very own Eric Carle style masterpiece. We’re going to get started by making our hand-painted papers. We laid down some paper before getting started because this can make quite a mess. Take this tissue paper that’s meant for wrapping gifts, and we’re going to apply a thin layer of paint. We want to do a bunch of colors we’re looking for a really nice textured paper that we can use for our collage. That is a big piece of paper. Once you’ve painted the pieces, you do not want to let them sit here, they’ll kind of glue to the tabletop. So, you might want to have some kind of clothes line hung up. We’ve got some strings hung around and we’re going to clip these up to let them dry. And don’t worry if it looks all wrinkled once they’re dry…you’re going to just flatten them all together. They’ll all flatten out and you’re gluing it down in the end anyway. Which colors do I want to go for? Do you want to take the warm colors and I’ll stick with kind of the lighter ones. You can do it like 40 different sheets. So what’s the easiest way to paint onto this paper? There’s really not a right way or a wrong way. This feels like chaos to me. Doing some research about Eric Carle… Eric was actually on Mr. Rogers. He actually showed Mr. Rogers what he does to prepare his papers. Oh, cool. He actually used tissue papers…just like this. He got really detailed. He used pieces of carpet to add layers. Oh, wow. Like he’d paint like green down and then he’ll dab some blue paint on a piece of carpet and he’ll make stripes. Wow, that’s cool. For today’s I think we’re just gonna do whatever we feel like. Okay. …and see what happens. Don’t worry about putting paint down on any aluminum foil or anything. Just do a few drops. Oops! I already started. Oh, that’s good. Yeah, just get… get messy. Oh, it looks like a crime scene already. This is actually just gonna be kind of a green to a blue. Or poor paints. We just go at ’em. There we go. I like it, Picasso! [Music] So a few days ago I actually created quite a few different options for us to use. We wanted these to be dry before going into the collages. Oh, this blue one’s cool. This one’s kind of a brown with a black mixed in it looks like. Once it’s dry, you just pull it out, flatten it out, put something heavy on top and they flattened out pretty nicely. Awesome. Here’s another one. It started to break as I was putting it on this string. But it really doesn’t matter because you’re gonna be using little pieces of these. Yeah, so we’re not gonna throw the scraps away we’ll save them for future project. We’re gonna just start with some fresh scissors. Nice. You need scissors to open the scissors. All right, should we go ahead and set aside like the colors that we’re gonna use? So two is going to be choosing your colors and then step three is cutting out your shapes. This is a lot of paper. It took me quite a while to paint all of these. Yeah! So you’ll want to arrange your shapes before you start gluing things down. So do I cut out the shapes first, or what do I do next? You’re choosing your colors, then you cut out your shapes. Okay. And then you arrange your shapes to decide how you want to glue it down. Okay. And then you ultimately glue it down. Okay, awesome. I’ve got some ideas for some cool details. Hopefully, so… I’m hoping it will turn out cool. It’s kind of a neat way to do a collage rather than just using black paper. Like this is just a black tissue paper, but you can see the brushstrokes. The brushstrokes look really cool on this. Can we say what we’re making yet, or do we want to keep it kind of a secret? I’m doing a nod to some cool artwork that I’ve seen before by an artist named Damien Hirst. It’s called Mickey Circles. So I’m going to be cutting out a bunch of circles and gluing those down. In the Lion King, there’s the part where Rafiki draws Simba on the tree. And so I’m kind of going to be replicating that drawing of Simba, but with the collage style of like how it looks when it’s drawn on to the tree. See how it turns out. Definitely gonna look more like it’s from a kid’s book because that’s kind of how these look because it’s the style that Eric Carle did. And it actually looks really cool with all the different textures and the colors. I’m excited to see how it turns out. It’s really cool just seeing the texture lines and the paper. You can make one and make a bunch of color copies. That’s what they do for Eric Carle’s books, right? Yeah. Cause he makes the original and then they make copies and that’s how they make the pages. It kind of feels like a kindergarten project or something you do in elementary school. Cutting circles is a tougher than it looks. Would it be a bad thing to glue down this before I add more to it? I don’t think so. Okay. Yeah, we have a bunch of different glue options. That’s just the regular… I’m gonna go for the regular. So bad thing about this is it is tissue paper, so you will see spots that will come through. So I do think using a glue stick might be the best option. This is scary. Once they go down there’s no going back. I mean, I really could just cut out another shape. But it feels really permanent for some reason. If you don’t like that layer just put another layer on top of it. Look you can see the Mickey kind of coming together. Oh, that looks really cool! It is missing the color for the head. Something I’m noticing as I’m gluing it down is you might get a few little wrinkles here and there. So it kind of adds a texture even though it it may be like oh, it’s ruined because it’s not completely flat. I think it’s okay because it kind of adds to the aesthetic a little bit. [Music] All right, so show and tell time. Here’s my Mickey Mouse. This one is in the style of Damien Hirst’s Mickey Circles. So it’s kind of a… an Eric Carl meets Damien Hirst. Um, really fun! It turned out so cool. I love the textures of the paint, too… on the tissue paper. It looks really cool because you have the cool texture from the paint as well. I’m gonna go with my more simple one first for show and tell. So first, we have our bouquet of balloons. Really simple. You just cut out circles and kind of layer them over the top of each other. They’re kind of translucent, so it actually looks like real balloons and then you just draw the strings at the end. And then you’ve got a bouquet of balloons with the cool texture and really easy to make. I enjoyed making that one. It was really quick! For doing Eric Carl style art, you got to do the caterpillar! It ended up being a lot simpler than I thought it would be. And it turned out so cool, too! The trick on this was not being afraid to overlap. So all those different segments – it’s okay if they’re bigger circles. You just overlap the next one on top of it. I was thinking I’d have to cut out every little segment separately. And that would take forever, so that ended up saving a lot. The other trick was actually folding and layering so that when I cut it was cutting through like six pieces at a time. Then also, the trick is to go back after with the colored pencil and add those little textures. Which you actually used on yours. I did. Yes, and you may have already seen a portion of this… But this is my more demanding project. I did a depiction of Simba with the tissue paper kind of like the drawing that Rafiki does on the tree a little bit. I tried to make it look more like that drawing than the actual character Simba. And then I did the really cool thumb swipe and we’ll probably show that to you… of the paint on his forehead like Rafiki does in the movie. And I liked this project because I was able to combine the painted paper, the colored pencils, and some of the paint too to make a cool hybrid project that totally looks like something inspired by Eric Carle’s work. If you decide to try this out, please let us know about in the comments. We’d love to hear about the different projects you try. If you enjoyed this video, please like and subscribe to our channel and please ring the bell so that way you’ll be notified when we do more videos. This is something I could definitely see us doing later on down the line, so if you enjoyed this video, we might do it again because the possibilities are endless. And by subscribing, you won’t miss that video. Yep. Thanks so much for watching. Thank you. Goodbye!


In-game Recipes from Disney Dreamlight Valley

Gotta Craft ‘Em All: Pokemon-Themed Ideas for Family Fun


